
MOSS image
MOSS-Image-Base is the base text-to-image model in the MOSS-Image family from OpenMOSS. It supports natural-language prompts, tag sequences, and JSON layouts for controlling text placement and object arrangement.
What sets it apart is layout control: besides a normal prompt, you can draw bounding boxes that tell the model exactly where each person, object and piece of text goes.
MOSS is in the Create → Image tab. Pick the MOSS family to open it.
Models
MOSS Image
The official MOSS Image model by OpenMOSS.
Moody Moss Mix
A community MOSS Image merge by catlover1937.
What makes MOSS different
Layout control. Draw a box and MOSS puts that subject inside it. You decide the composition instead of hoping the prompt lands right.
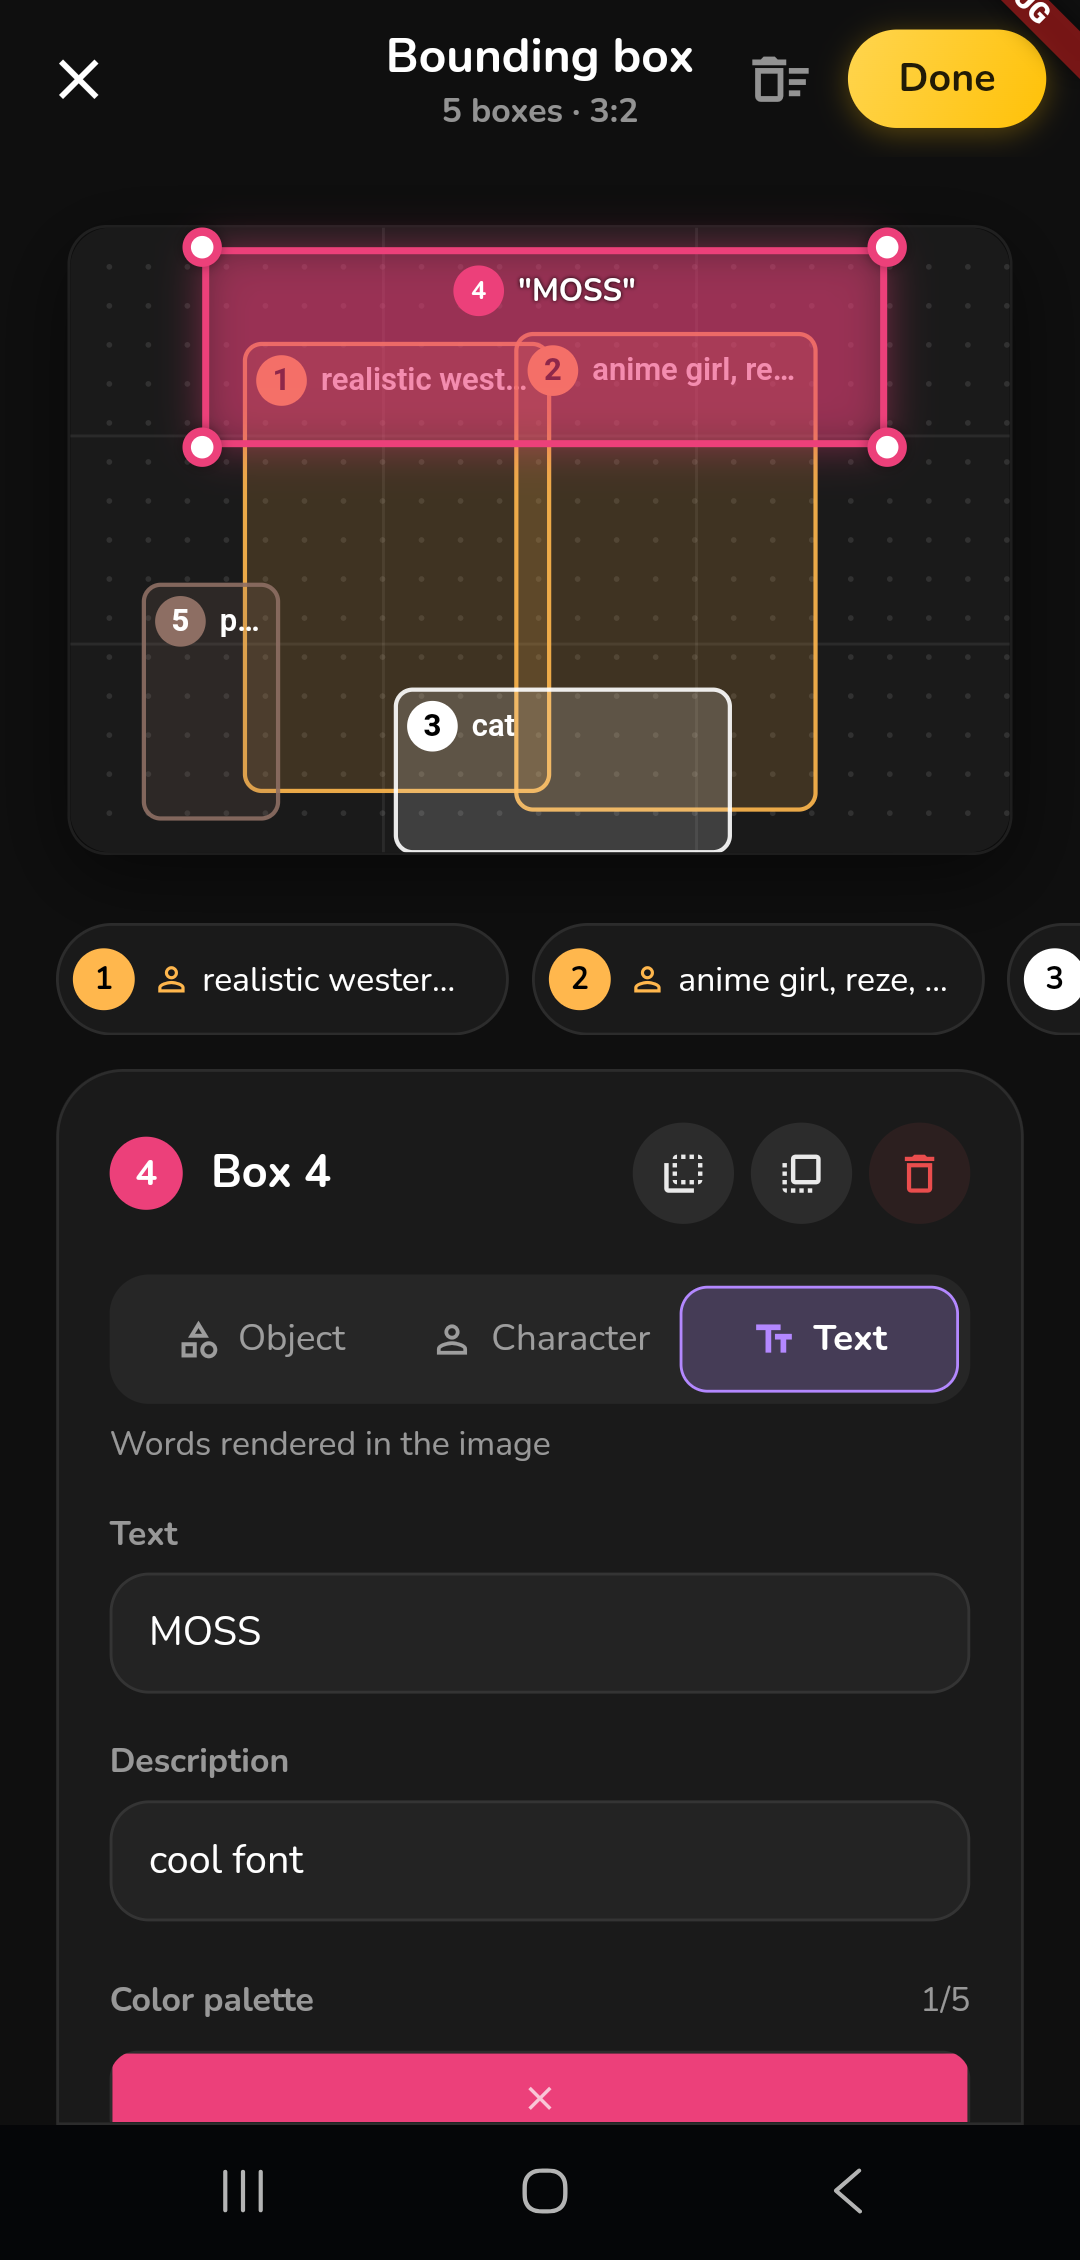
Text in the image. A Text box renders the exact words you type, in the place you drew it, such as a title, a sign or a logo.
Characters and objects. Mark a box as a Character to tell MOSS it holds a person or creature, so people in a group scene stay separate.
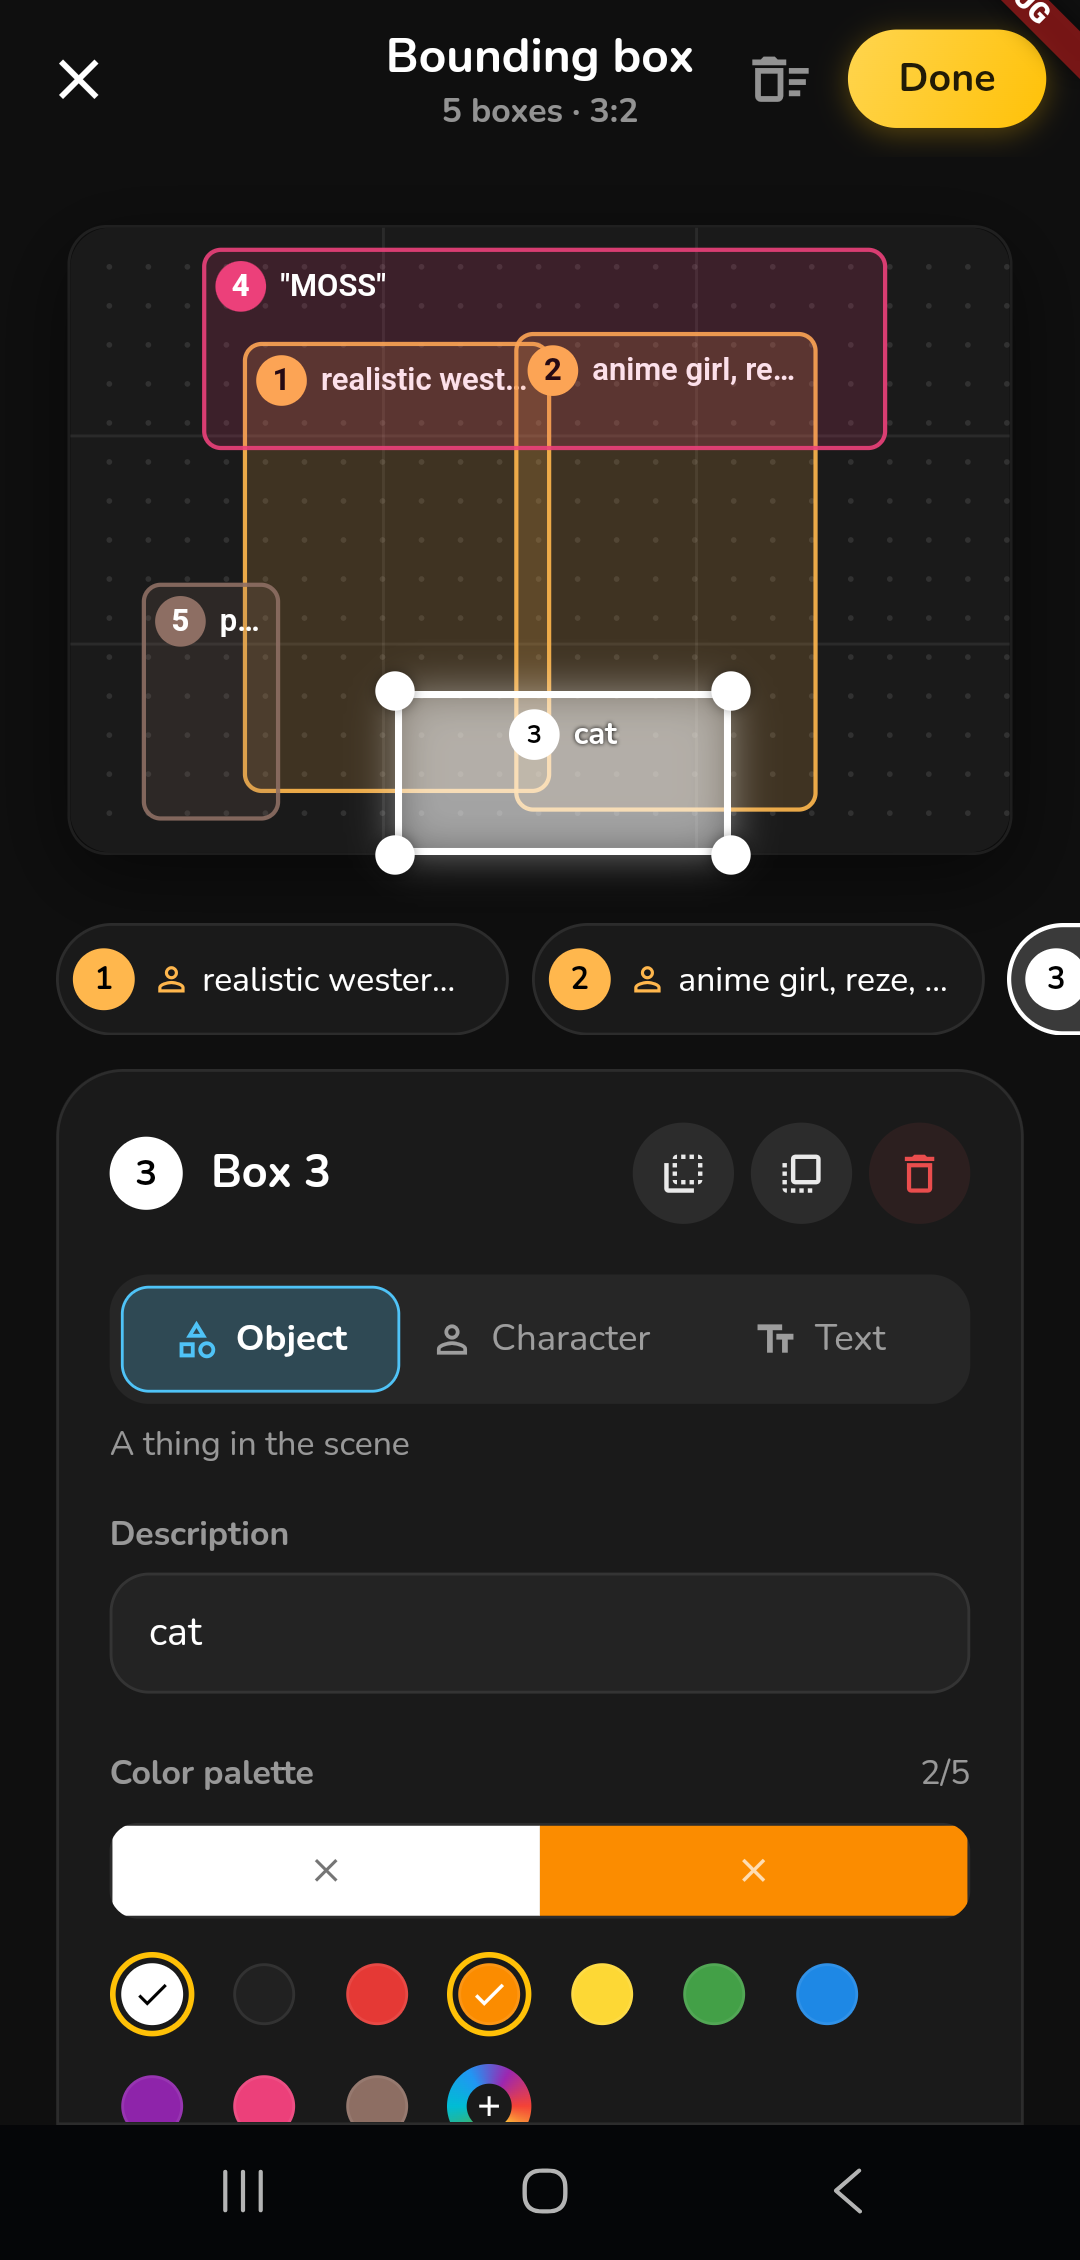
Colour palettes. Give any box up to 5 colours to steer the colours of what is inside it.
Native 2K. Generate a 2K image directly instead of upscaling afterwards.
The MOSS tab
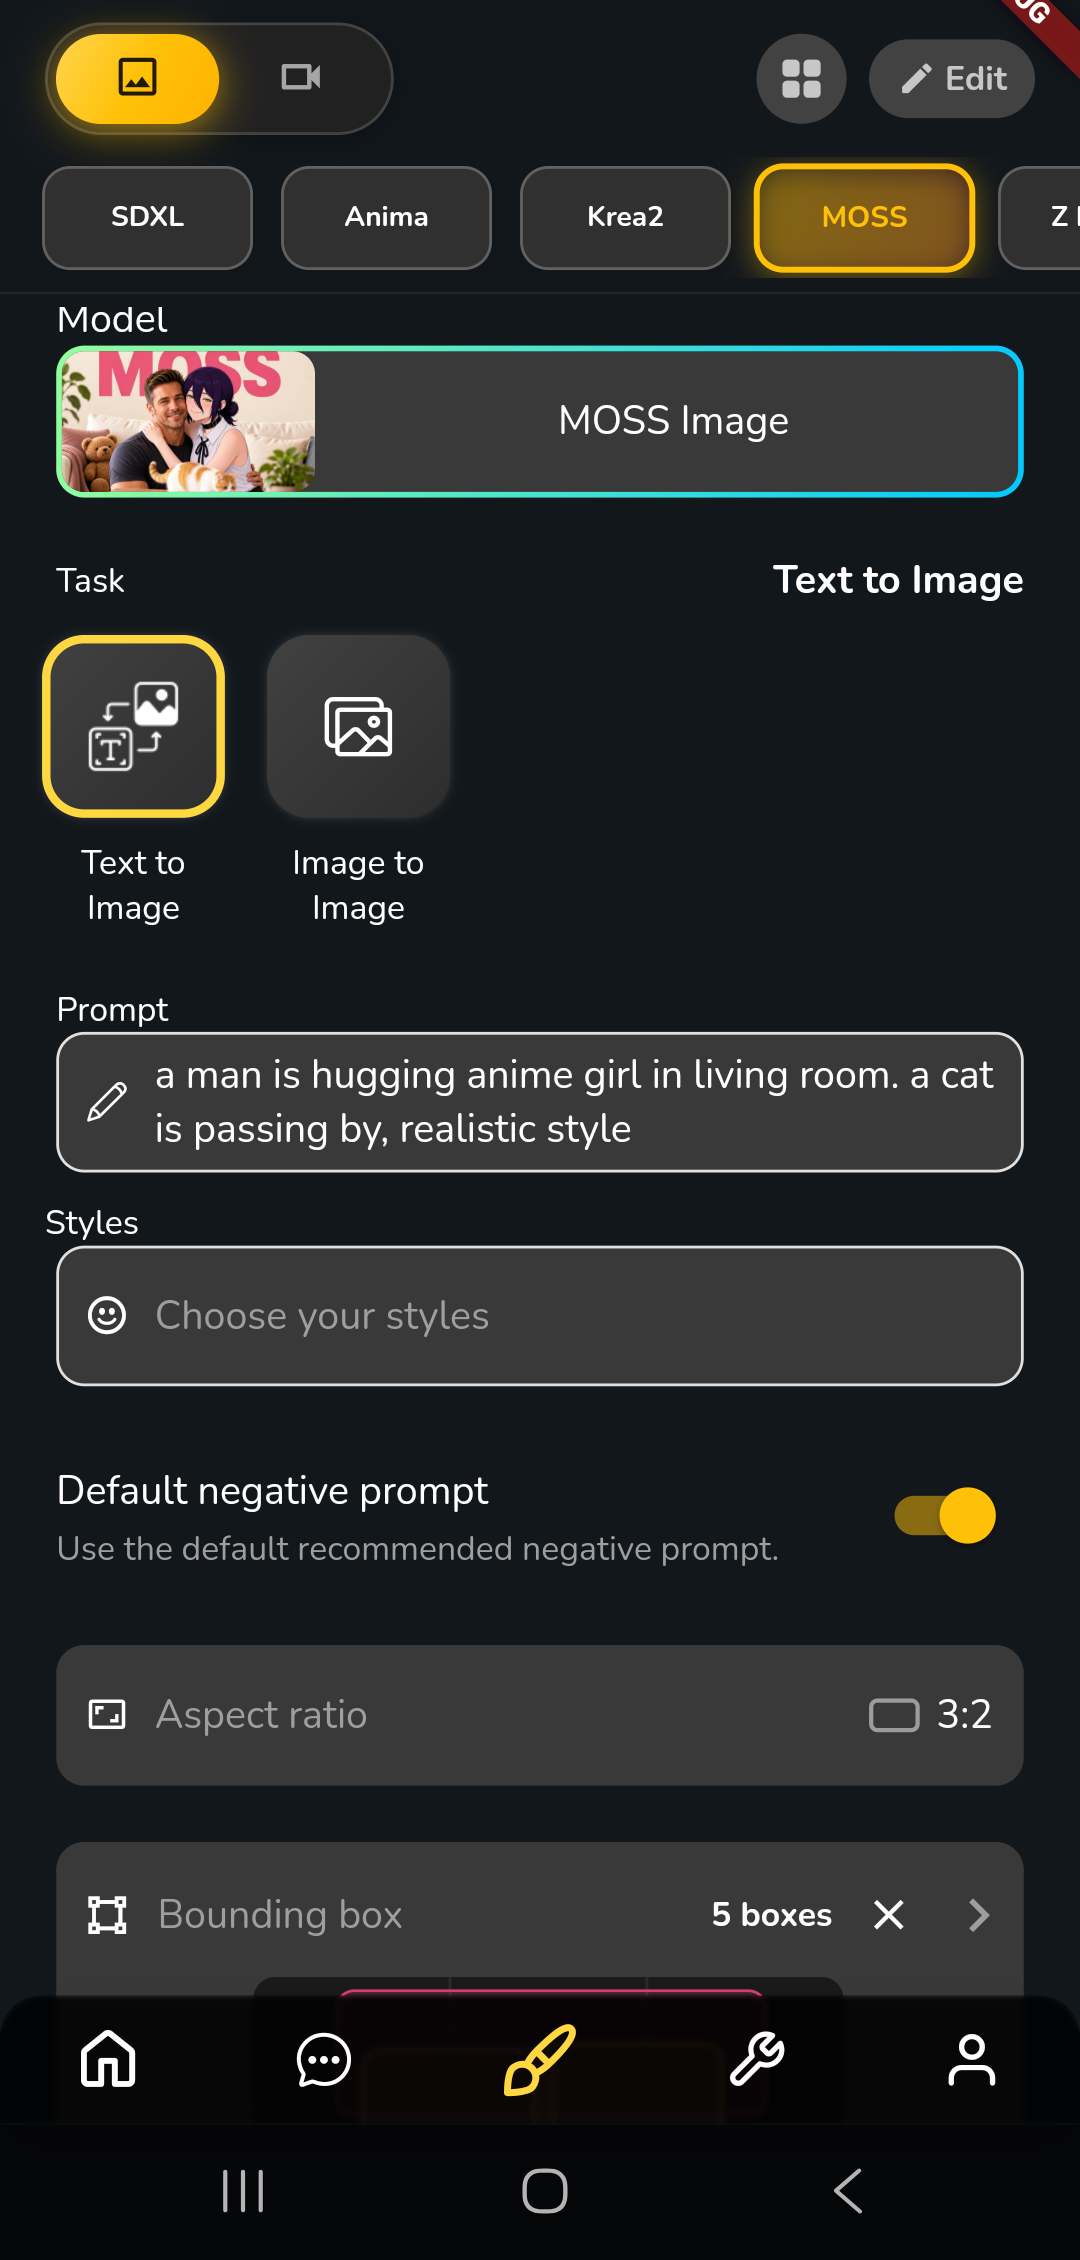
Task: Text to Image, or Image to Image to start from your own picture.
Prompt: describe the whole scene. With bounding boxes, this is the overall caption of the image.
Styles: add styles as with other models.
Default negative prompt: on by default. Turn it off to write your own negative prompt.
Aspect ratio: the bounding box canvas follows this ratio.
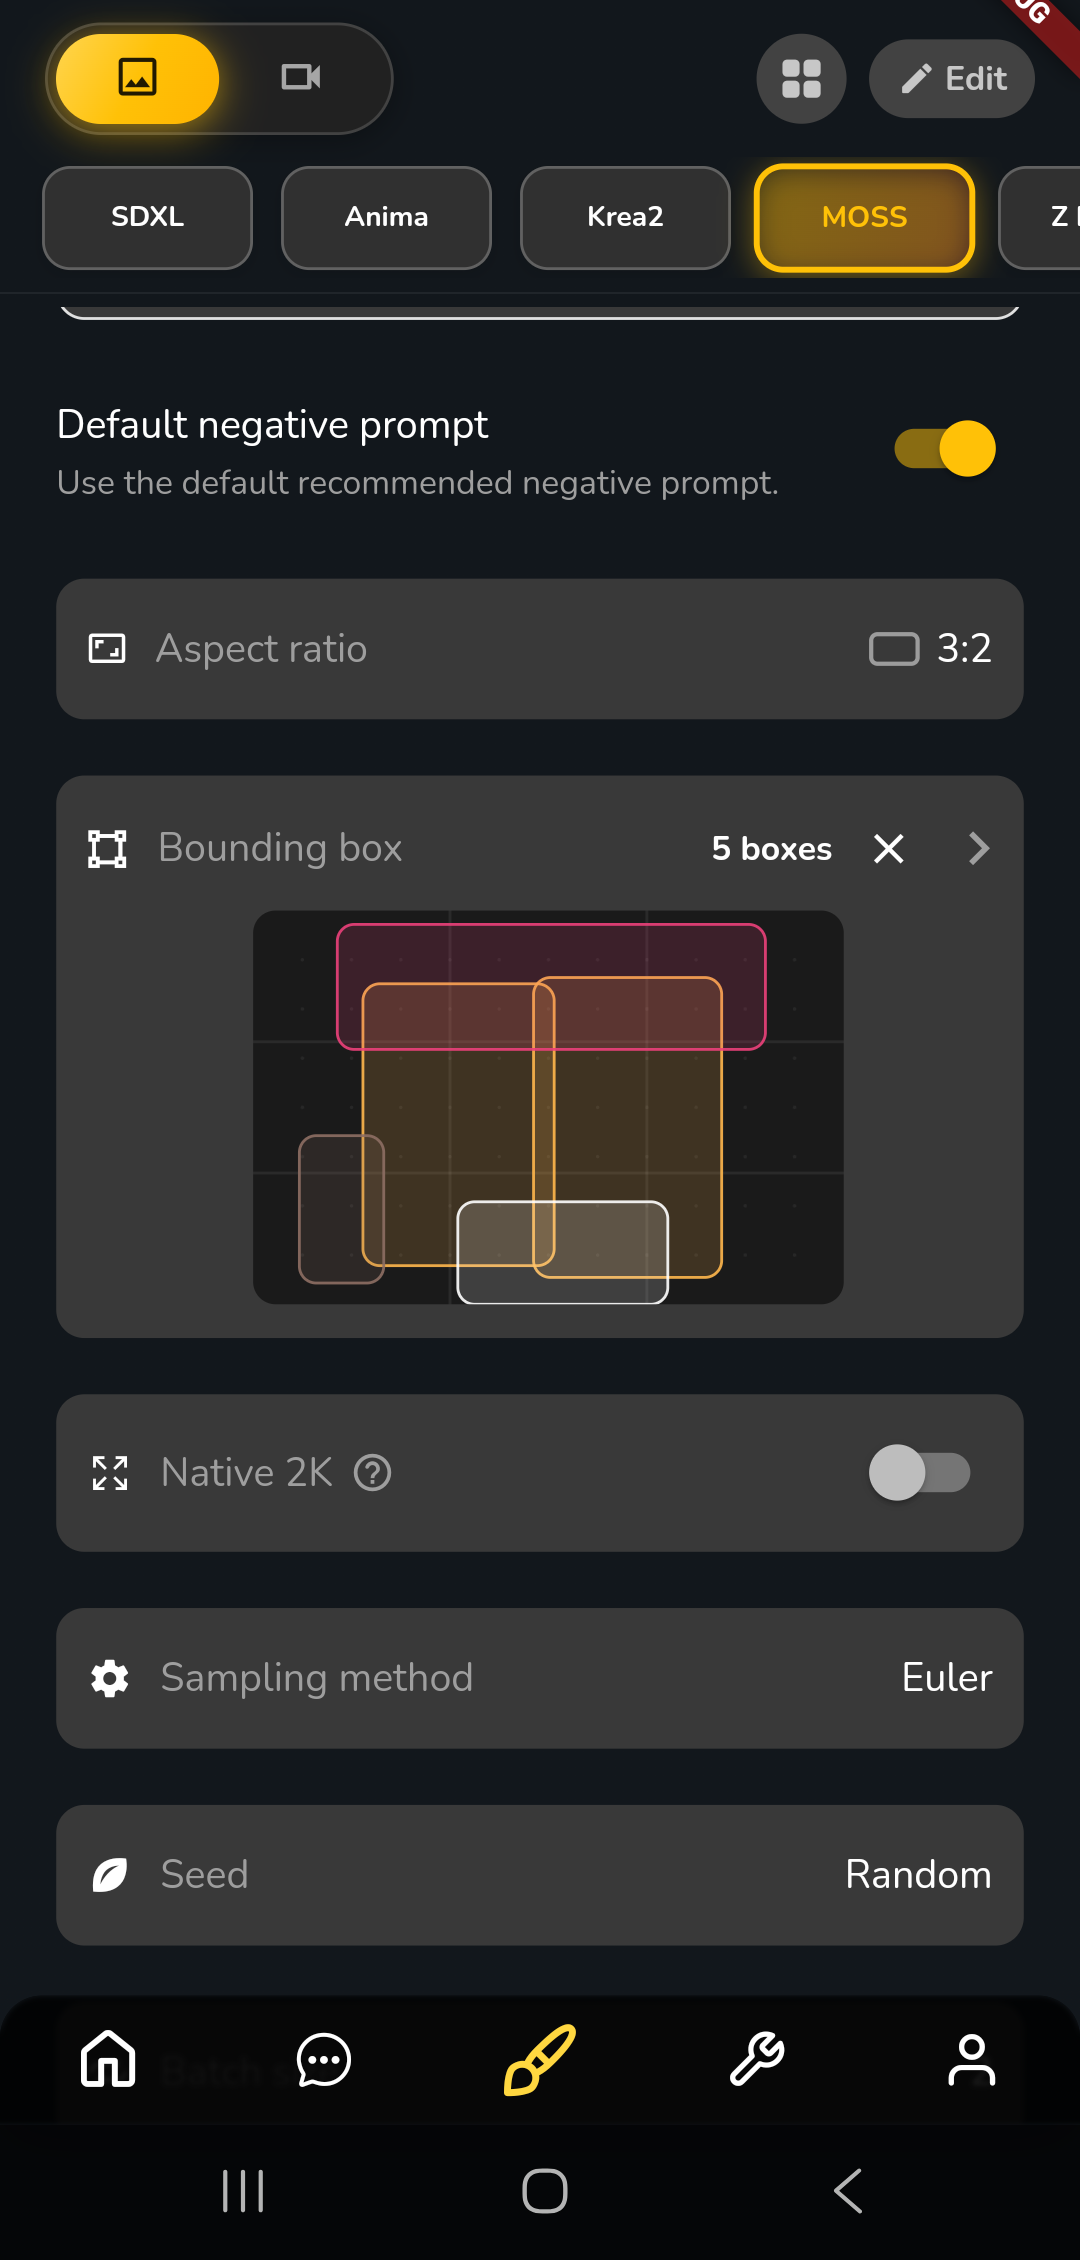
Bounding box: opens the layout editor (see below).
Native 2K: outputs a 2K image and uses double the credits.
Bounding Box
Bounding boxes work with both Text to Image and Image to Image.
1. Open the editor
Tap Bounding box below Aspect ratio. Once you have drawn boxes, the card shows how many there are and a small preview. Tap ✕ on the card to remove them all.
2. Draw your layout
The editor opens a canvas in your current aspect ratio.
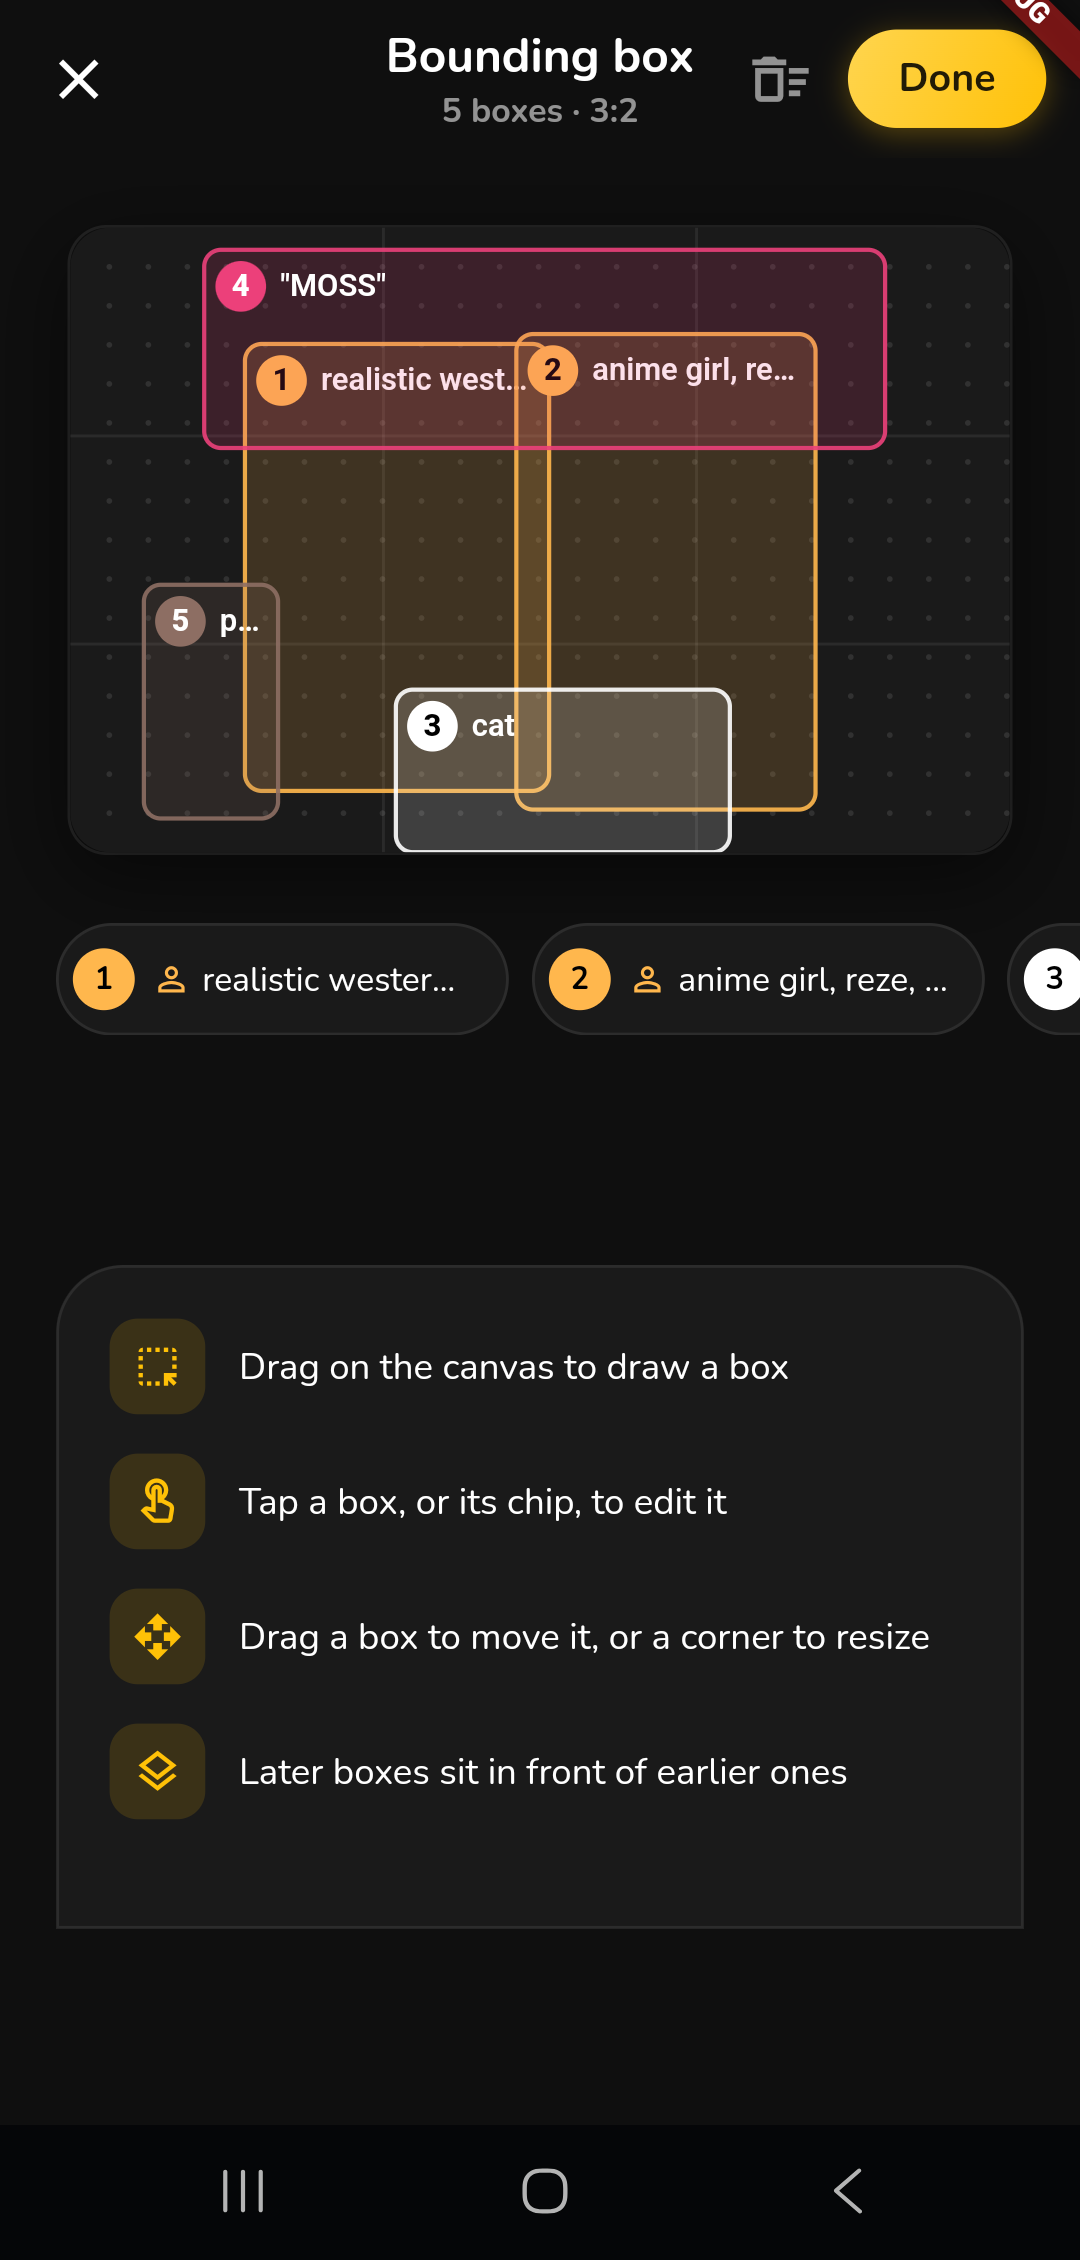
Draw: drag on an empty part of the canvas, or tap + Add.
Select: tap a box, or its chip below the canvas.
Move: drag the selected box.
Resize: drag one of its corners. Large boxes can also be resized from their edges.
Layer order: boxes are layered back to front, so later boxes sit in front of earlier ones. Use the layer buttons to move a box backward or forward.
Delete: tap the bin on the selected box, or the clear-all icon at the top to remove every box.
Tap Done to keep your layout. Tap ✕ to leave without saving changes.
Boxes are stored relative to the canvas. If you change the aspect ratio afterwards, they stretch with it, so set the aspect ratio first.
3. Set up each box
Select a box to edit it in the panel below the canvas.
Type. Every box is one of three types, each with its own colour on the canvas:
Object
Things in the scene: a cat, a sofa, a cup
Blue
Character
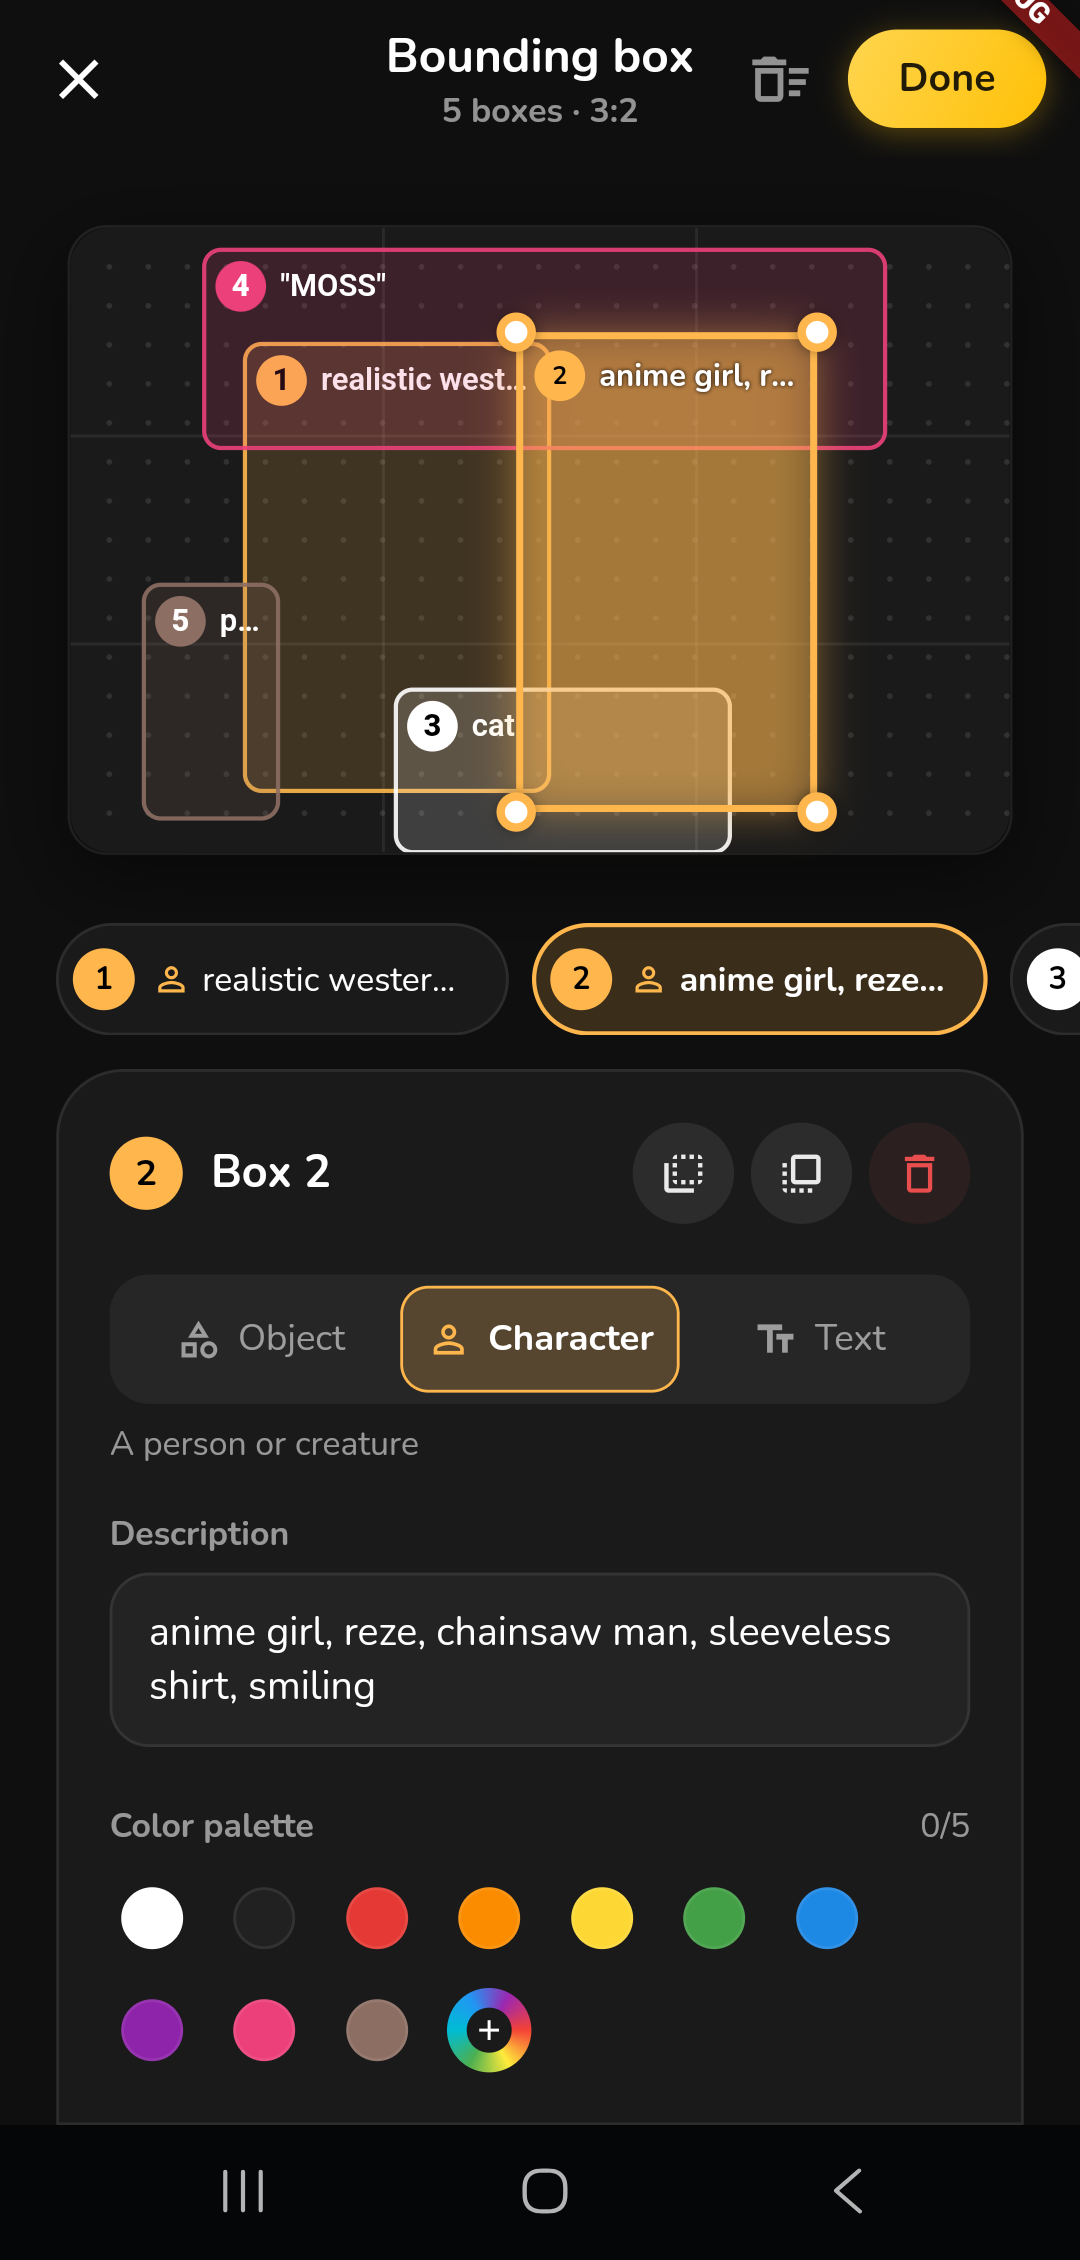
A person or creature
Orange
Text
Words that should appear in the image
Purple
Once a box has a palette, it shows the palette's first colour instead.
Description. Say what goes in the box. Keep it short and specific.
Text (Text boxes only). Type the exact words to render. Use the description for how they should look, for example "cool font".
Colour palette. Tap preset colours or the colour wheel to add up to 5 colours. Tap a colour in the bar to remove it. The box takes its first colour on the canvas.
Example
This is the layout from the screenshots above.
Prompt: a man is hugging anime girl in living room. a cat is passing by, realistic style
Model: MOSS Image · Task: Text to Image · Aspect ratio: 3:2
1
Character
realistic western man, realistic style
2
Character
anime girl, reze, chainsaw man, sleeveless shirt, smiling
3
Object
cat
White, orange
4
Text
cool font
MOSS
Pink
5
Object
puffy bear
Brown
Result
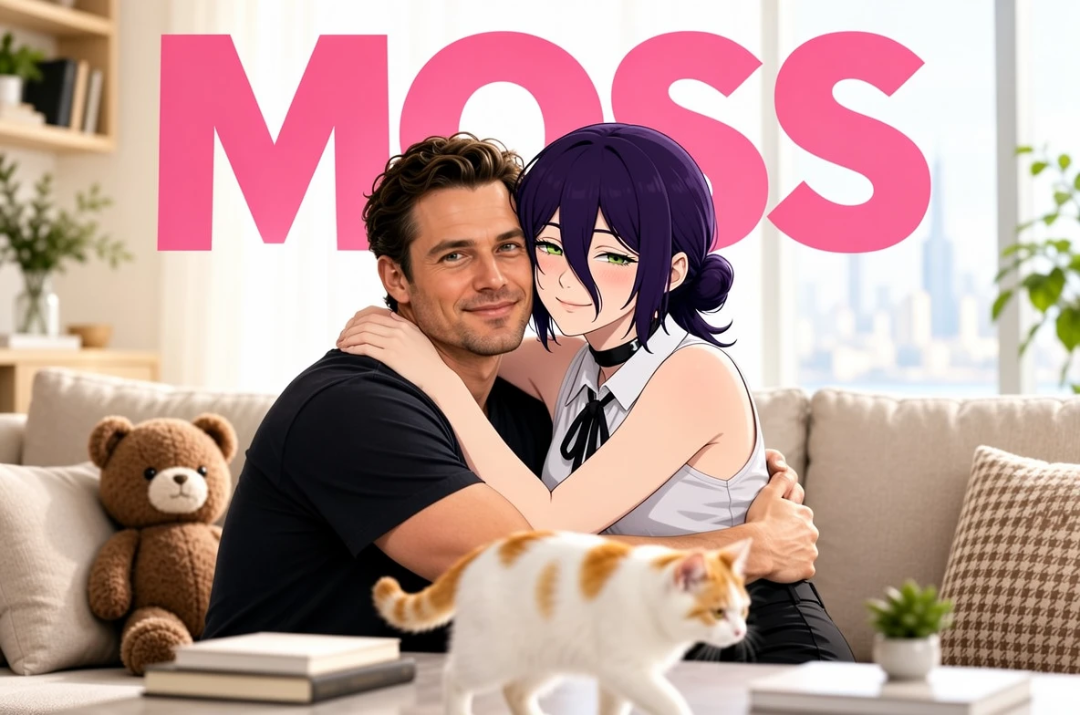
"MOSS" is written across the top in pink, inside box 4.
The two characters sit side by side where boxes 1 and 2 were drawn, each in its own style.
The cat in box 3 follows its white and orange palette.
The brown bear fills the small box 5 on the left, even though the prompt never mentions it.
Tips
Use the prompt for the whole scene and the boxes for placement. Describe the setting and mood in the prompt, and what goes where in the boxes.
Draw the background first and the foreground last. Later boxes sit in front, so put the subjects you want in front at the end.
Mark people as Character. This keeps several people in one image distinct from each other.
Keep text boxes to a title, a sign or a short phrase. Put the exact words in Text and the style in Description.
Use palettes for key colours, such as a brand colour or a pet's fur, rather than on every box.
Last updated